Looking at how your existing light switch is wired up can help you identify which wire is which in your wall box. Once you’ve identified your wires, installing the Brilliant Control is much easier.
We’ve taken out some of the work for you, and have looked at some of the most common light switches out there. We’ve labelled the wires for you in the pictures below to help with the identification process.
First, here are some vocabulary terms that will help you along the way:
Common Terminal: When installing a Brilliant, the Common wire hole is where you will insert your “Line” or “Load” wire into the Brilliant base. Brilliant can automatically detect which wire is “Line” and which is “Load”, so it doesn’t matter which of these two wires you install into the Common wire hole.
Ground Wire: This wire is green or bare copper, and may or may not be attached to your old switch. If it’s not attached to your old switch, it may be clustered together in a bundle in the back of your wall box. This wire is needed to install Brilliant, and is required for safety. This is installed in the wire hole labelled with the ground symbol (shown below).

Line Wire: This is the wire that provides the 120 Volts of power to your switch from the power company. It is usually a black wire. The Brilliant Control can automatically detect which wire is “Line” and which is “Load”, so they are interchangeable when installing in a single-pole configuration. In a 3-way configuration, the "Line" wire should be connected to the "Common" terminal of the Brilliant Control.
Load Wire: This is the wire that connects your switch to your light bulb or other “load” (ie: a fan or other appliance). It is also usually black. The Brilliant Control can automatically detect which wire is “Line” and which is “Load”, so they are interchangeable when installing in a single-pole configuration. In a 3-way configuration with a traditional rocker switch, the "Load" wire should be connected to the "C" terminal of the Brilliant Control. You can learn more about multi-way configurations by reading these two support articles.
Setting up multiple Brilliant Controls on a multi-way configuration
Installing the Brilliant Control in 3-way and 4-way configurations
Neutral Wire: This is usually only attached if your old switch is a smart switch or certain dimmer switches. It is usually a white wire. If it’s not attached to your old switch, look for a cluster of white wires bundled together in the back of your wall box. The Brilliant Control requires a neutral wire to install. To read more about the neutral wire, you can check out this support article here.
Traveler Wires: These wires are only for multi-way configurations and always occur in pairs. They are often a red or black wires. They connect the Brilliant Control to another multiway switch . To find out more about multi-way configurations, check out the support articles above in the "Load Wire" section. When installing the Brilliant Control in 3-way configurations, the traveler wires will be installed in the wire holes labelled “L1” and “L2”.
Now that you'er familiar with some of the wires you'll be identifying, you can figure out which wire is which based on the type of switch you have installed. Here are some images of common light switches and the locations of the different types of wires.
| Switch Type | Image 1 | Image 2 |
|
Lutron Maestro 3-Way Model & Configuration |
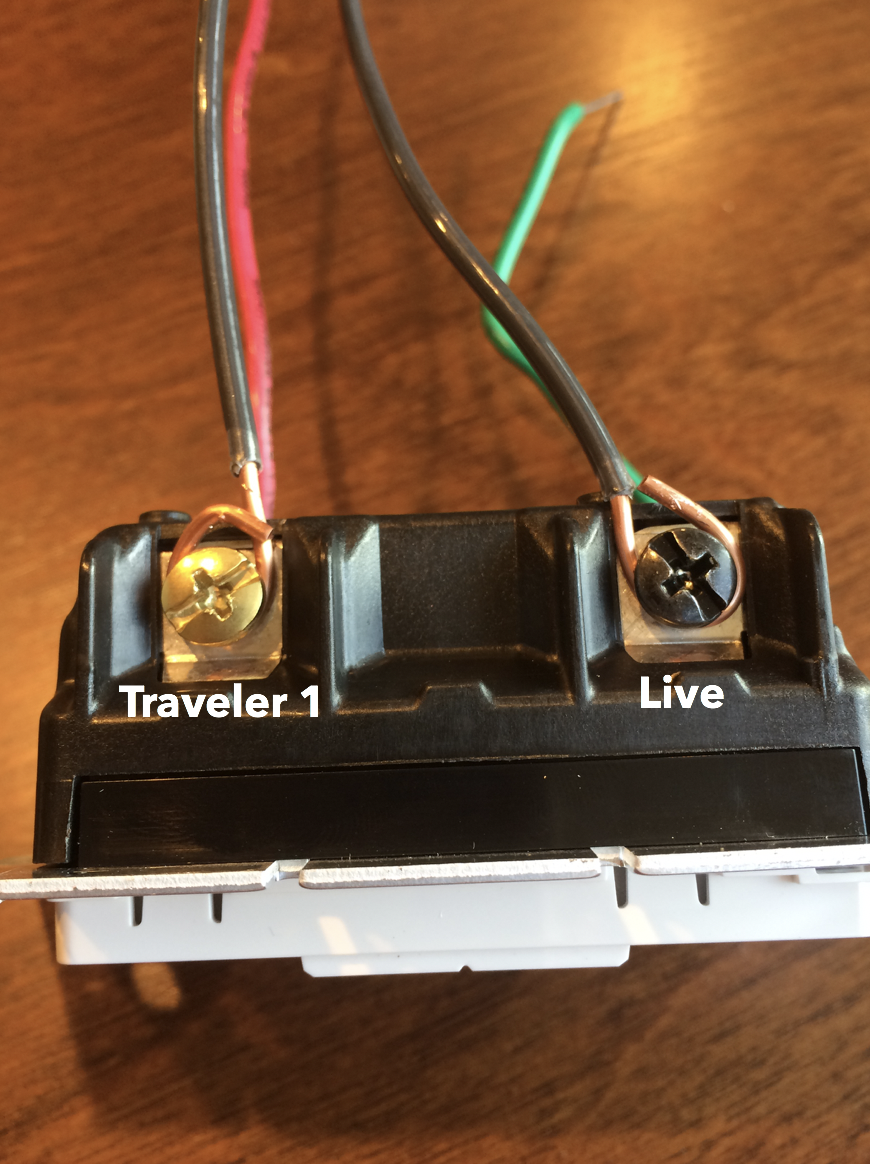 |
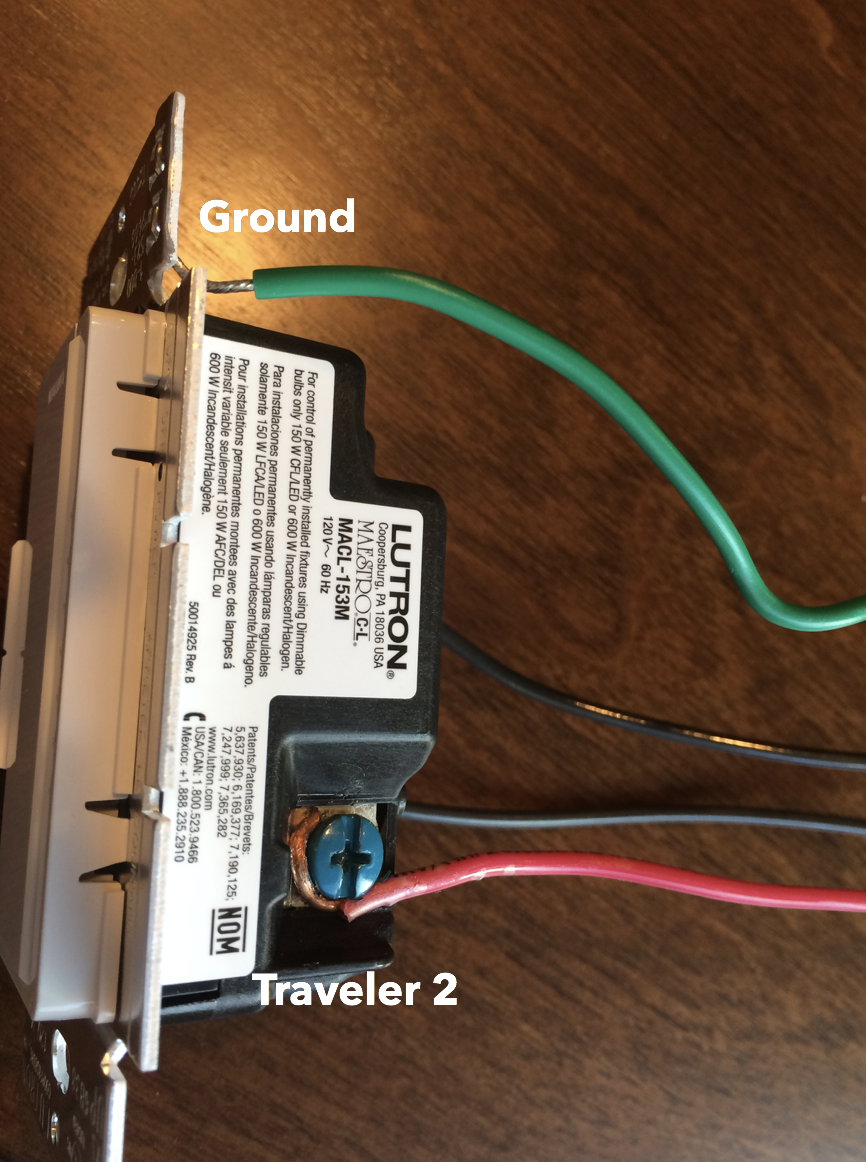 |
|
Lutron Diva 3-Way Model & Configuration |
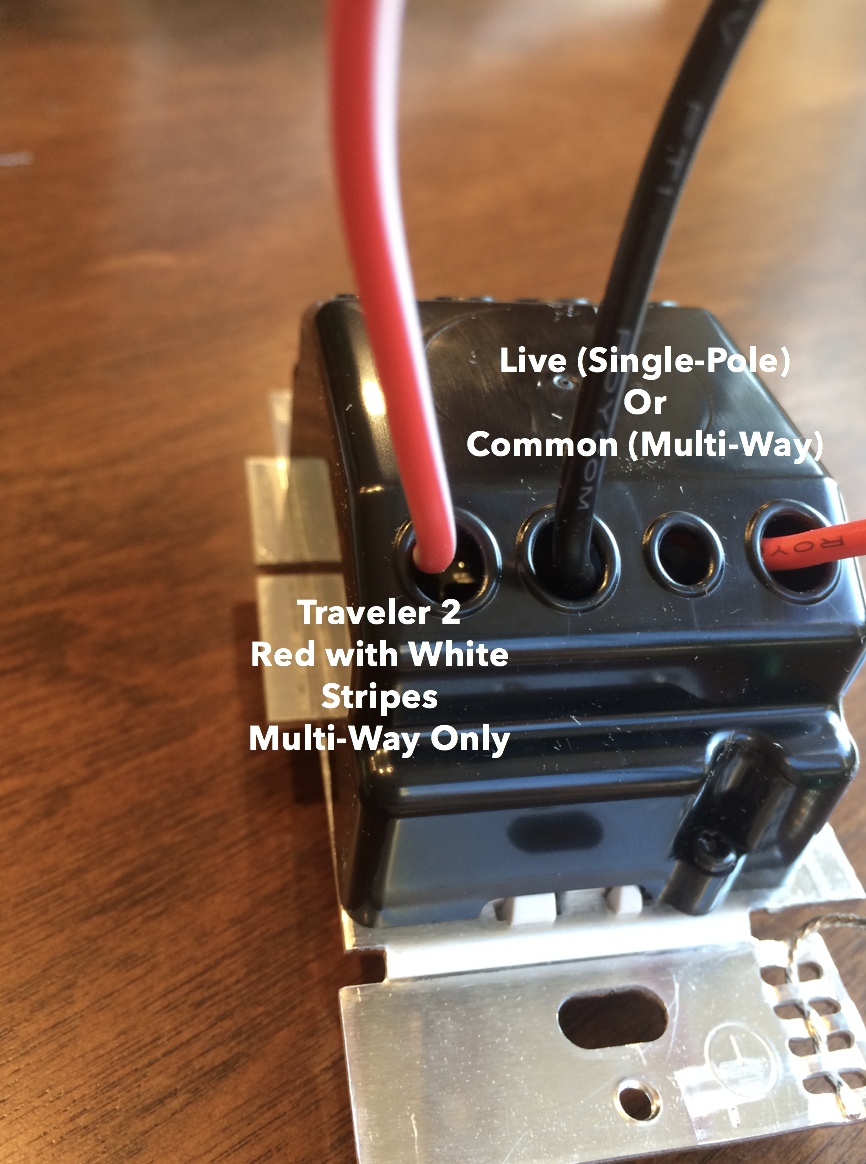 |
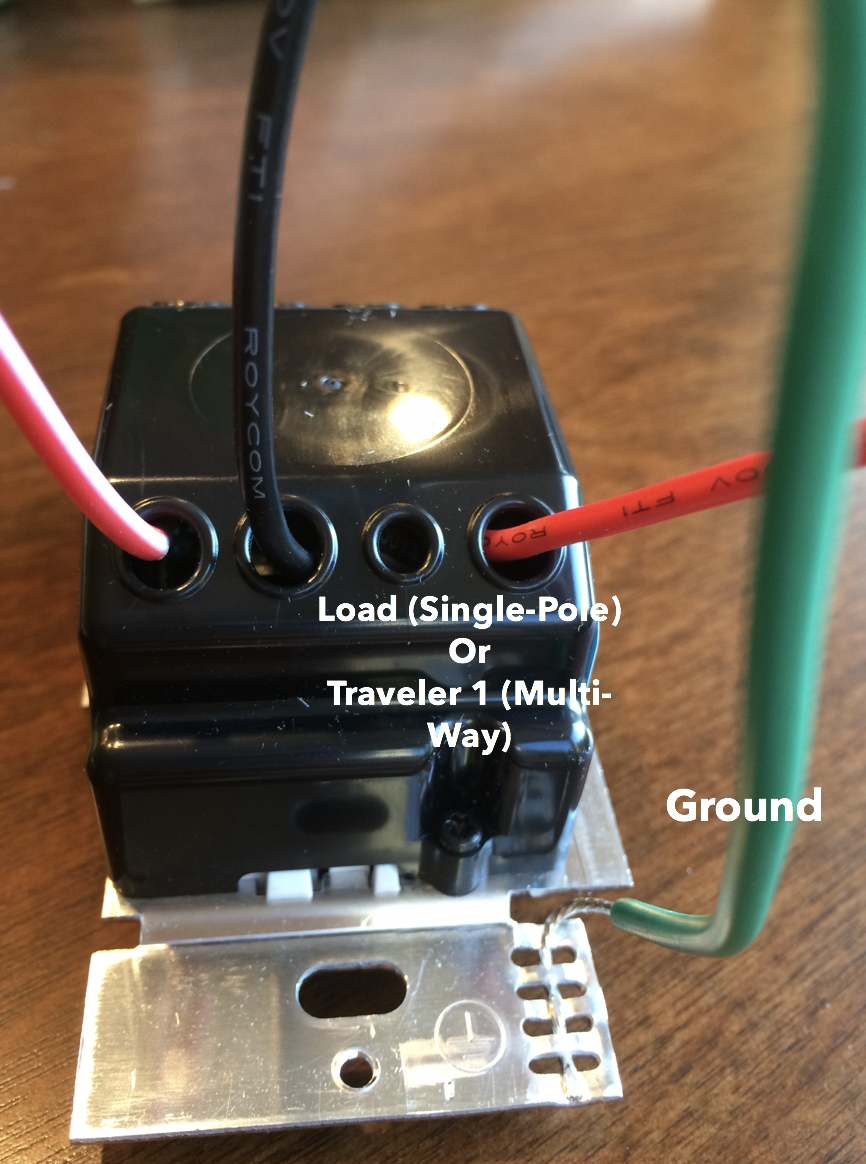 |
|
Lutron Rocker 3-Way Model & Configuration |
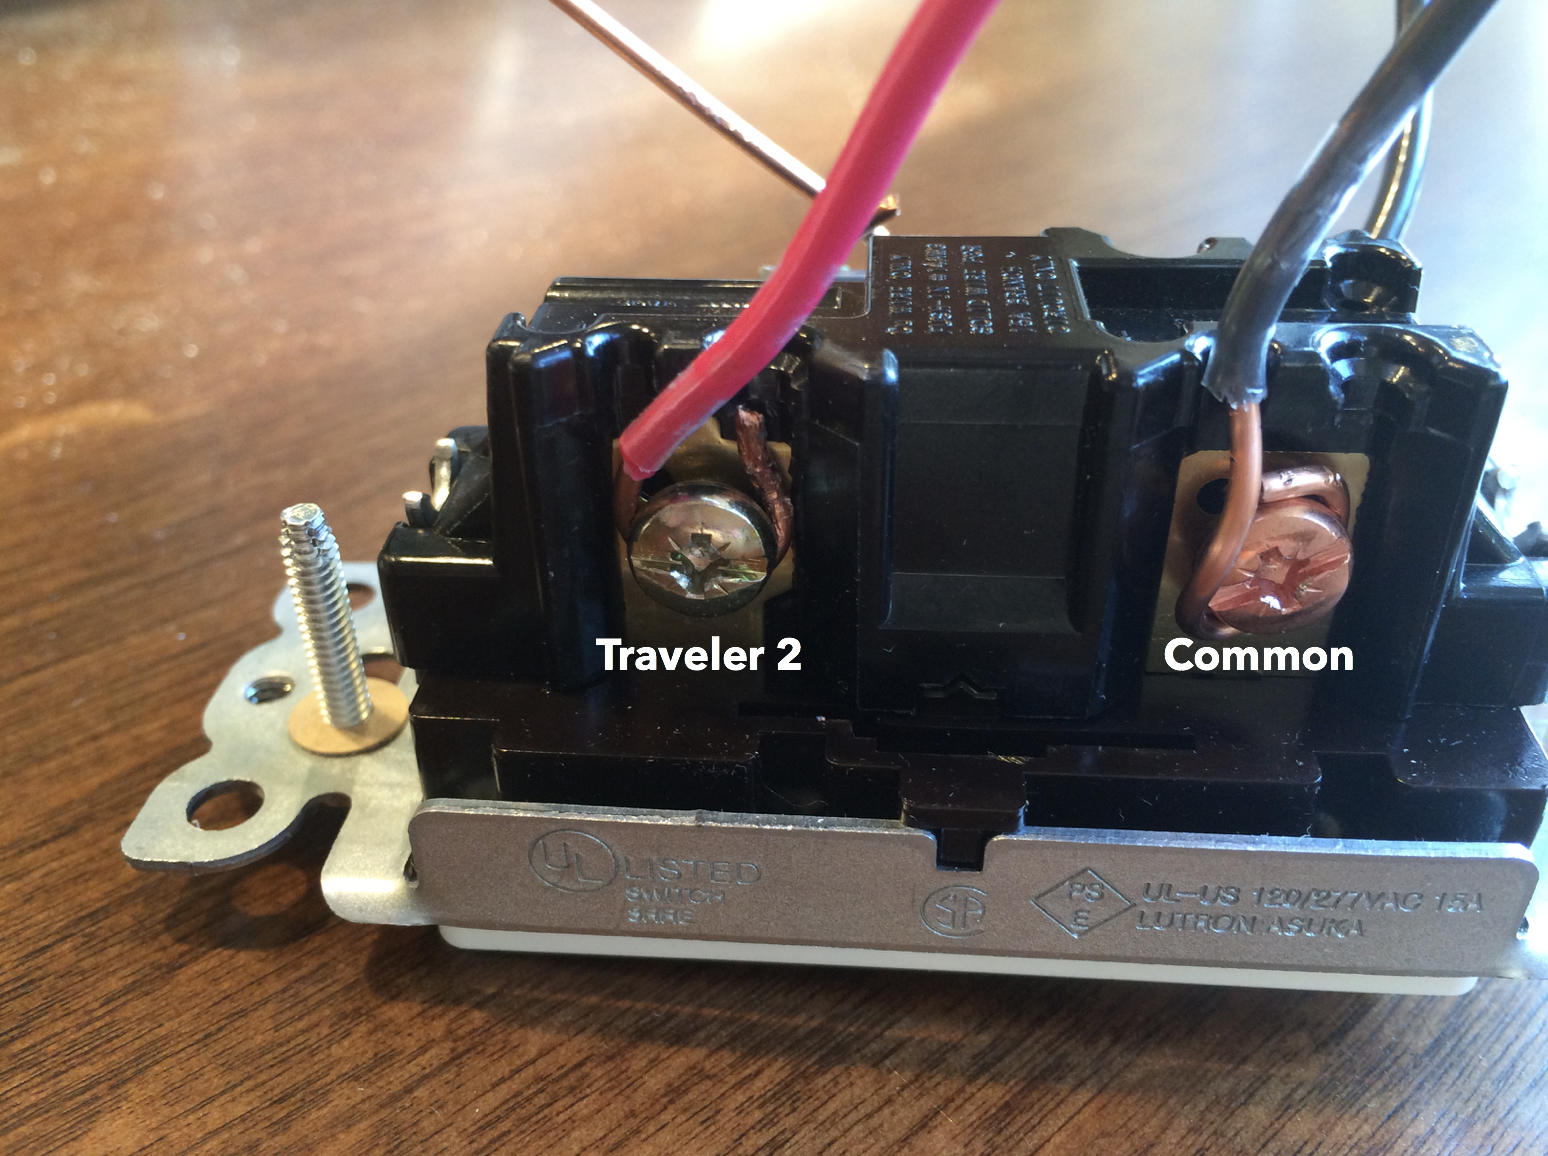 |
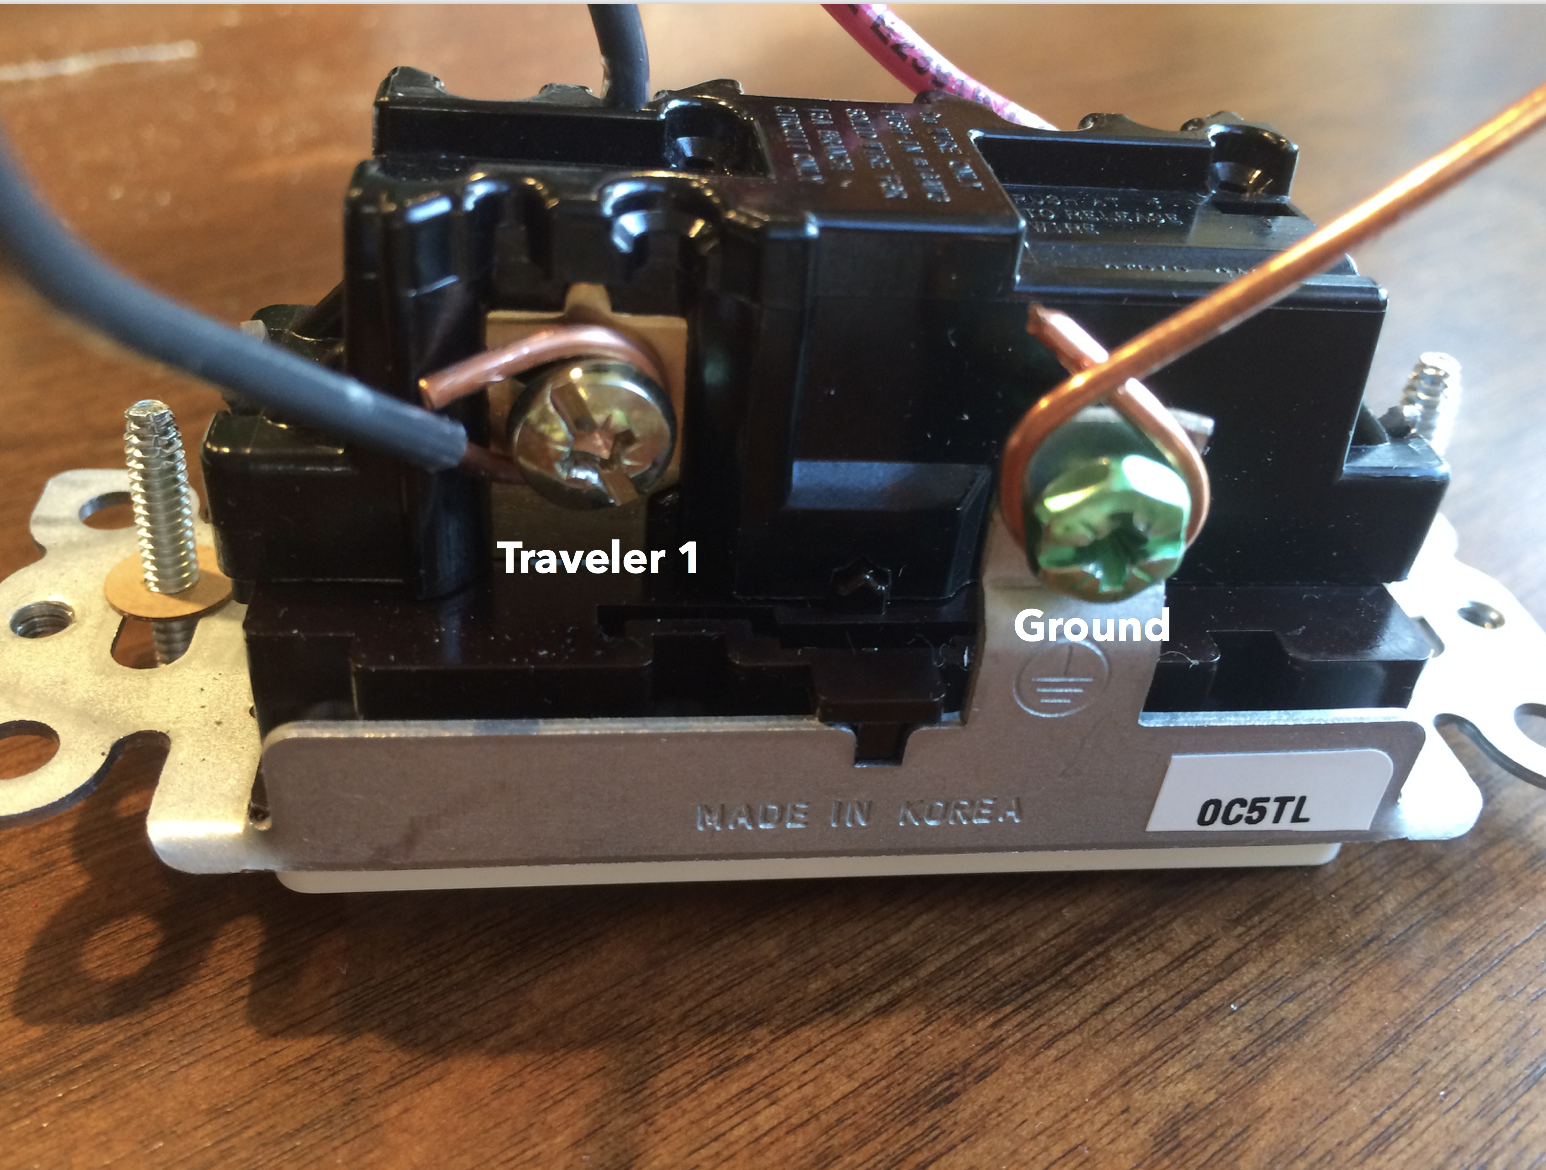 |
|
LeGrand 3-Way Model & Configuration |
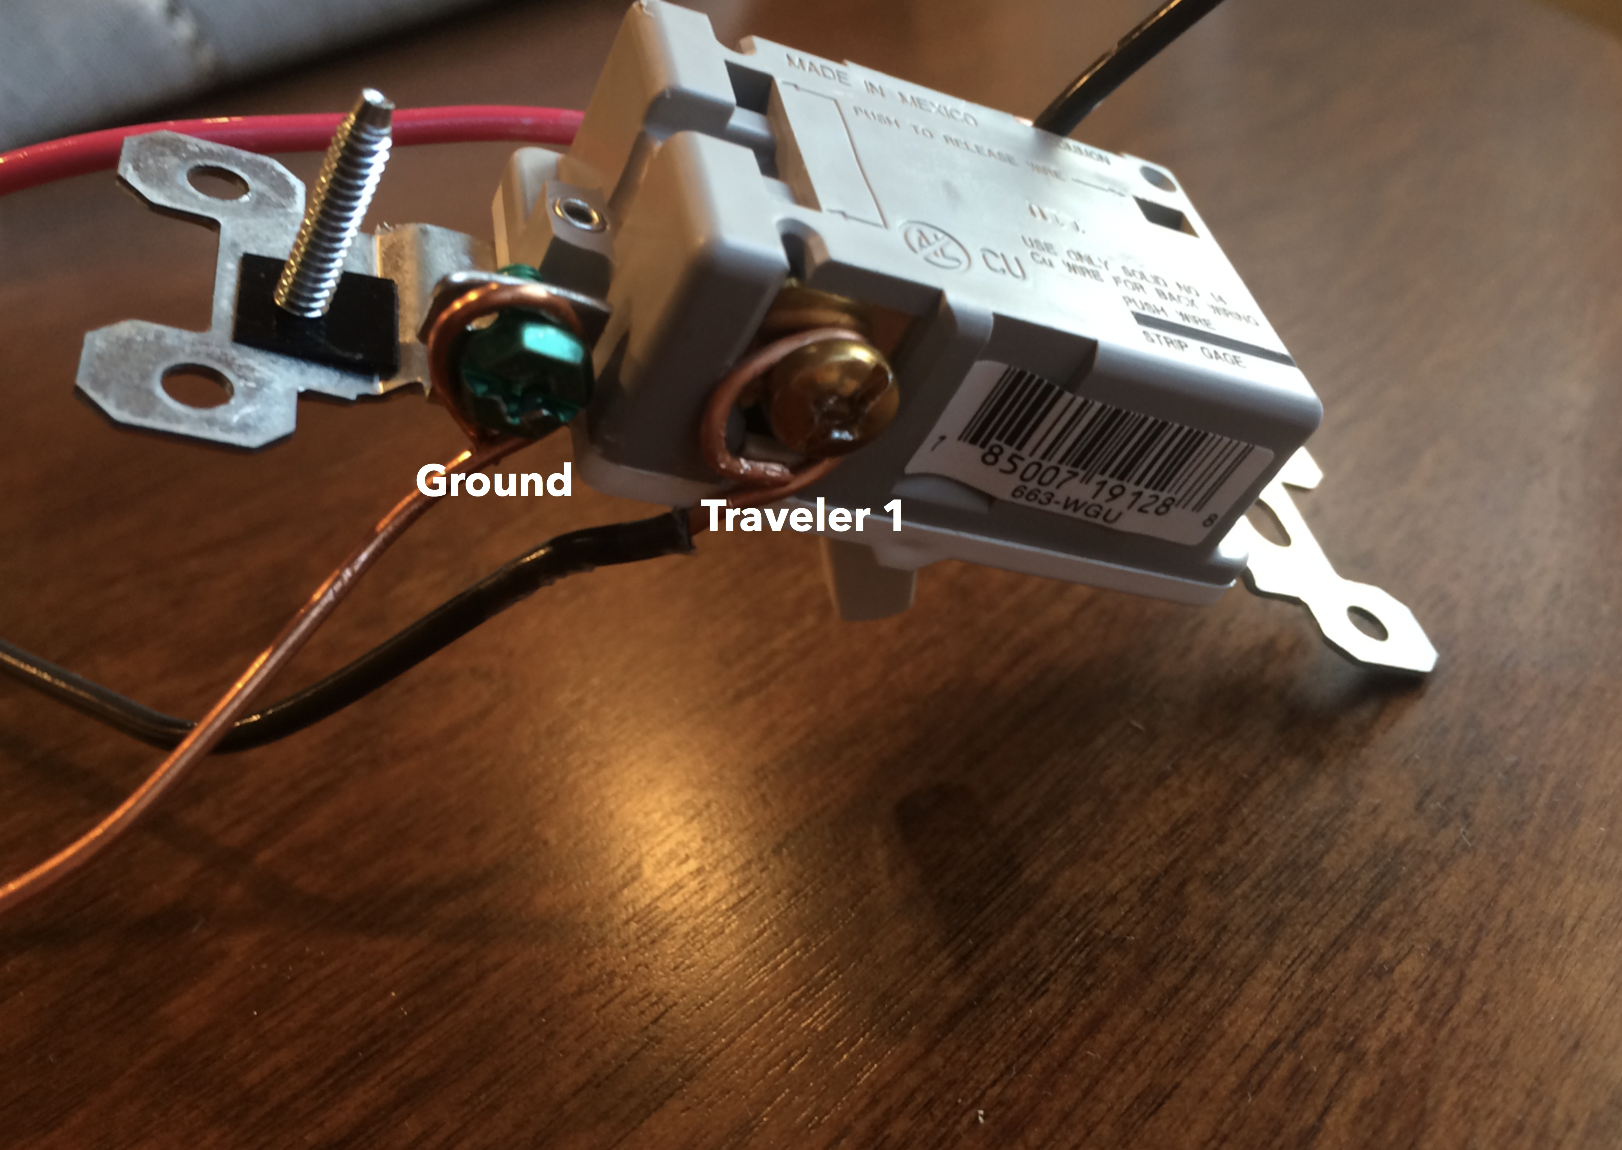 |
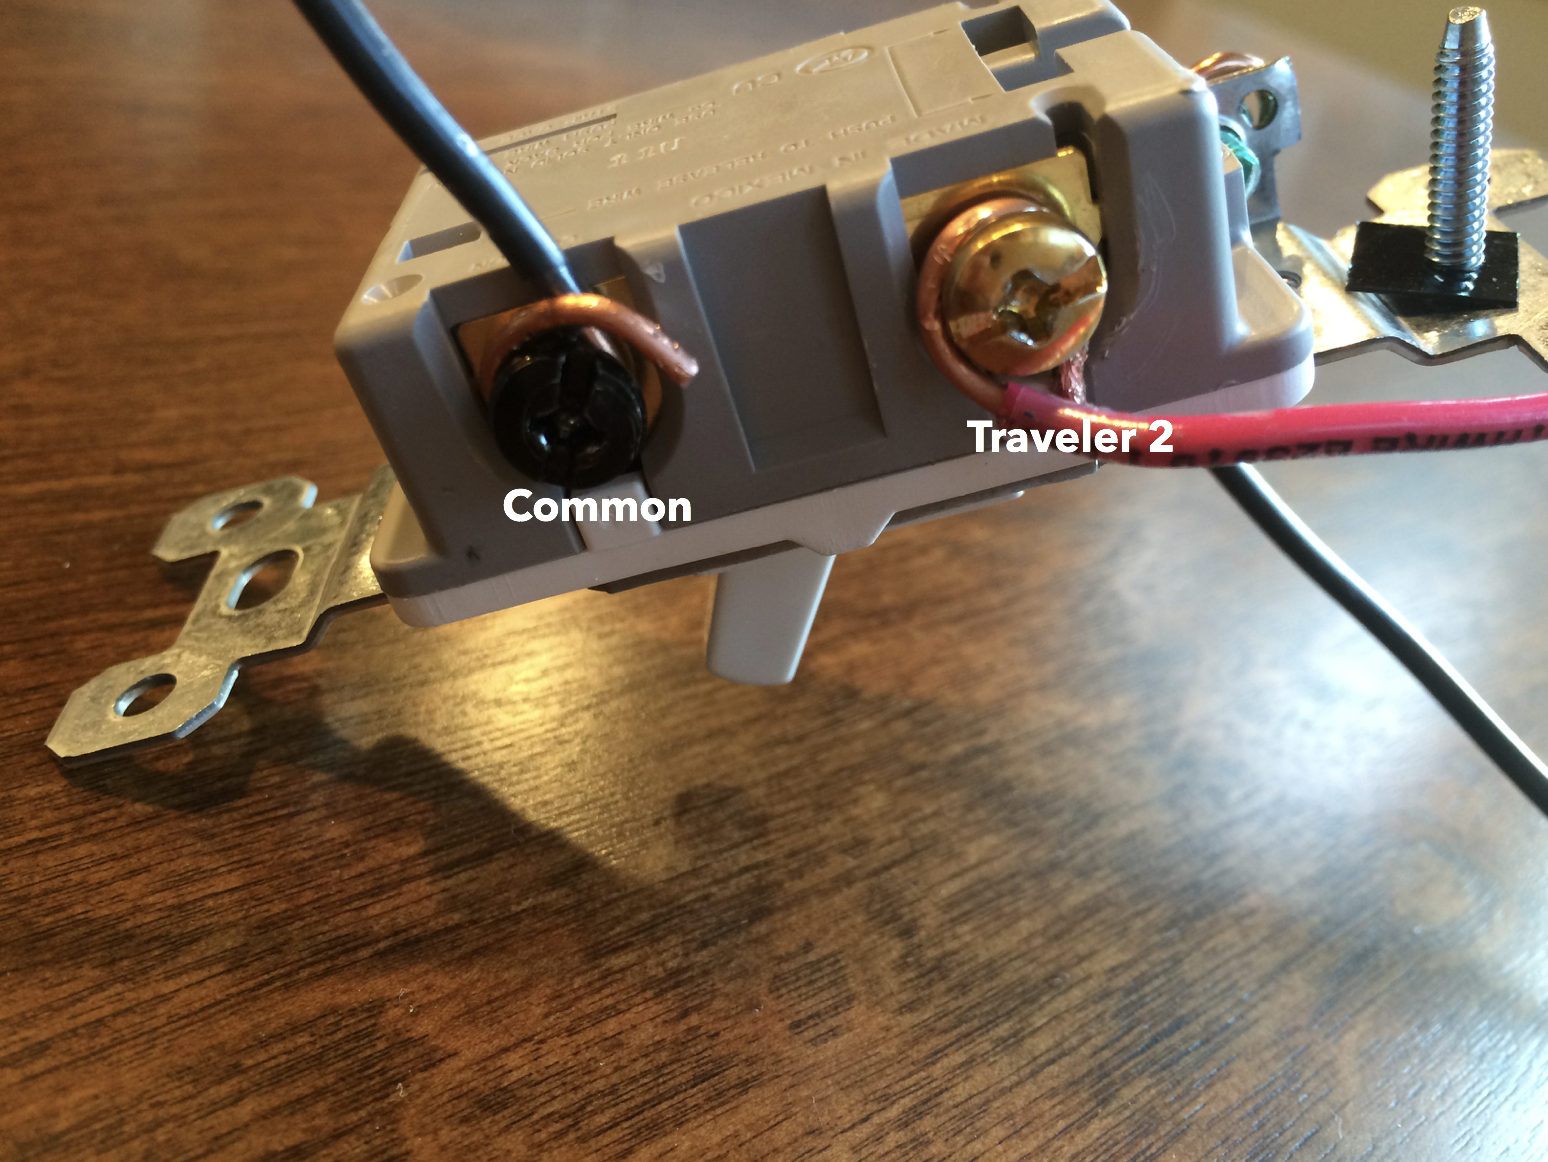 |
|
Lutron Rocker 4-Way Model & Configuration |
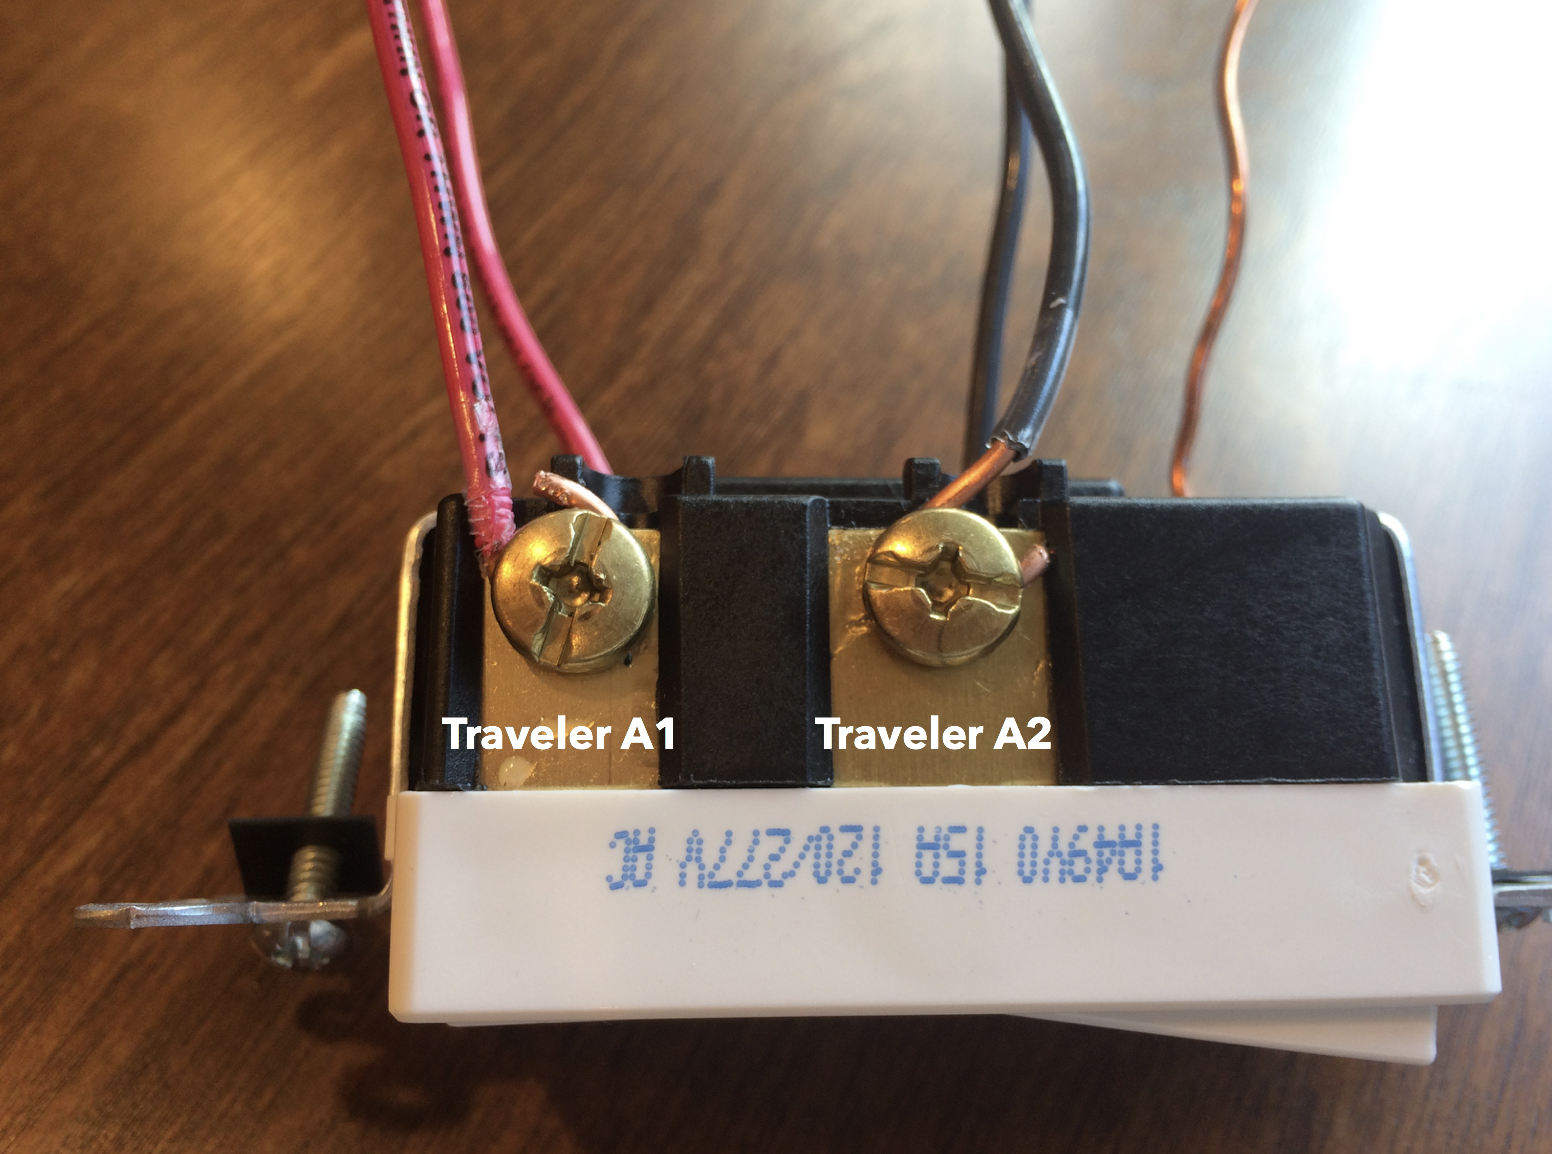 |
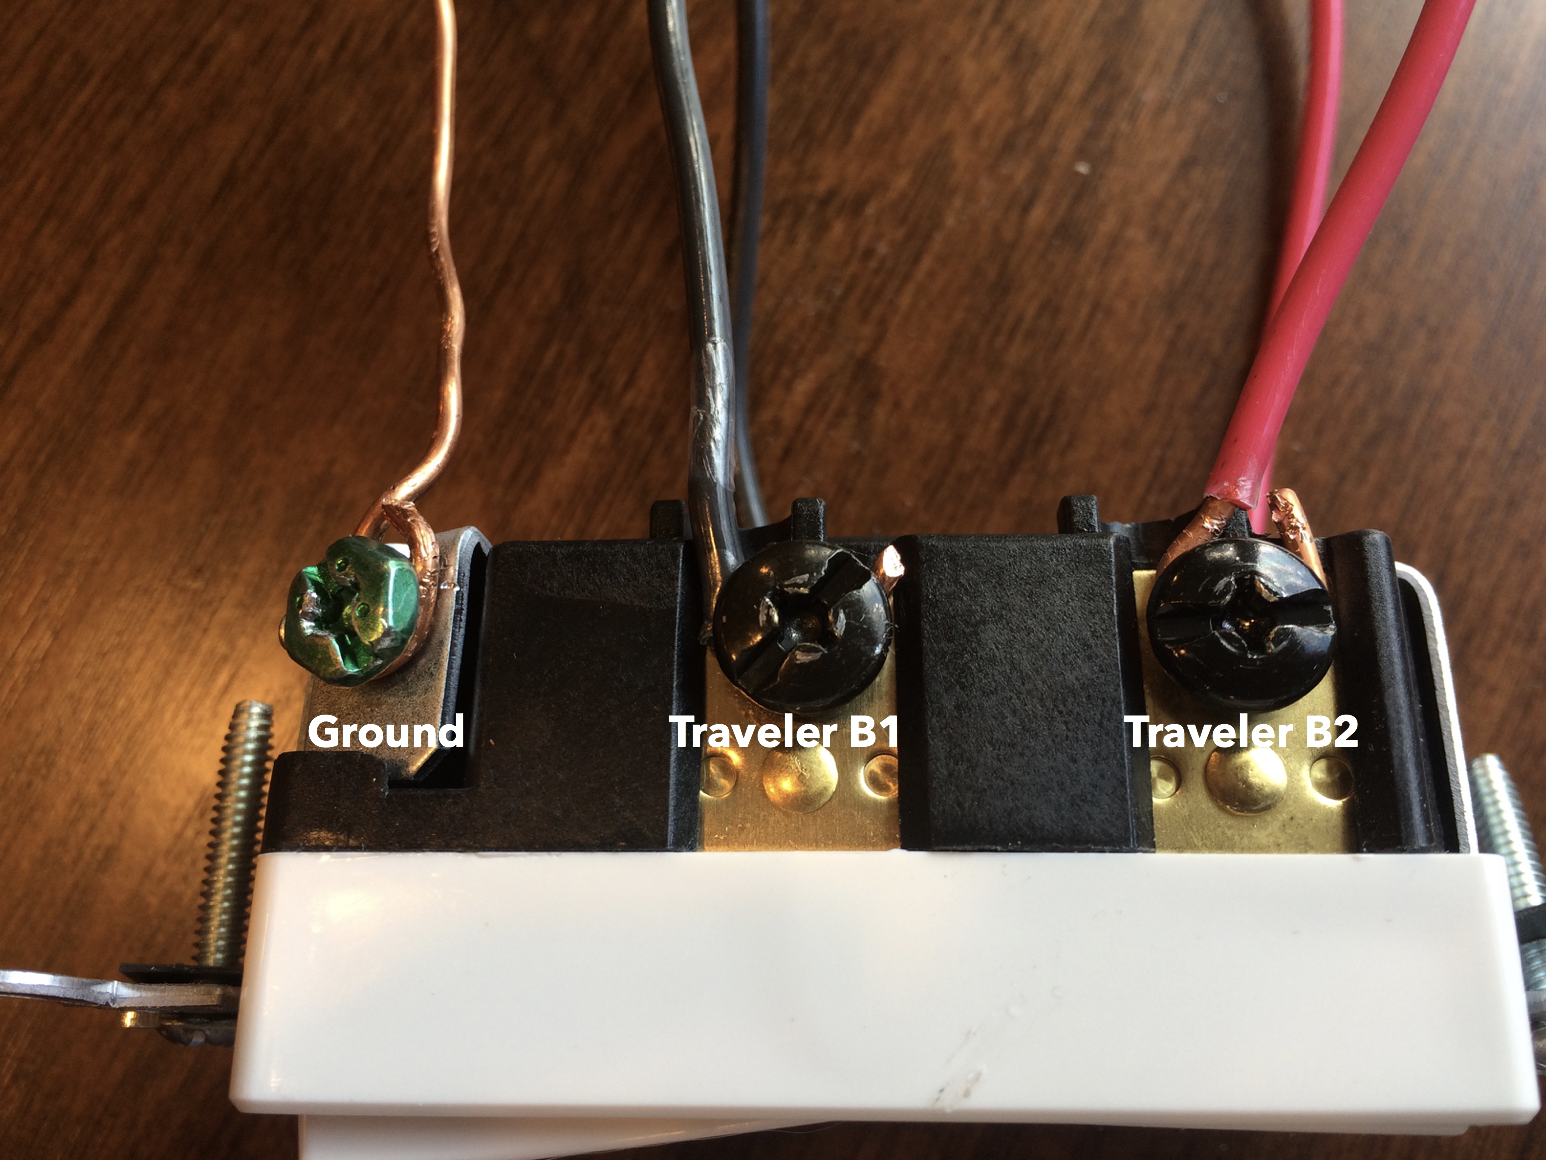 |
|
Smart Switch |
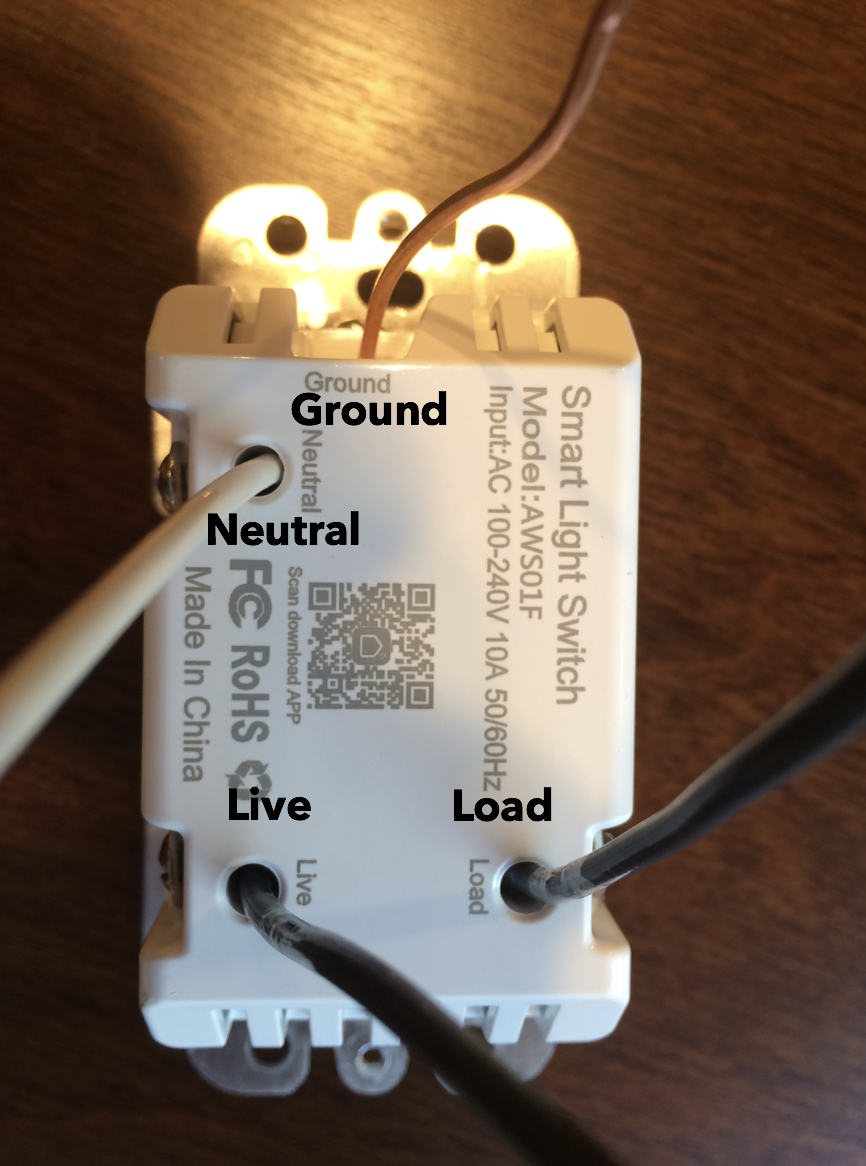 |